
Italo-Ostrogoths Take 3
Peter K at Essex Warriors asked me for another practice game. This time he requested I use a different army and asked me to use my Samanids. Details about these and the Italo-Ostrogoths are available in full in previous blogs. DBM v3.2 400 AP
Peter's army is 75 E 68.5 EE and Breaks on 34.5 EE losses in three commands. As stated before my Samanids are 65 E 59 EE and Breaks on 29.5 EE losses in four commands
Given my Aggression rating of 1 v the Italo-Ostrogoths rating of 0 there was a reasonable chance that I might be the defender but yet again I ended up as the invader. The dice roll was only 1 which meant there was in effect no weather effects in the Summer when I chose to invade.
I broke the habit of a life time and took the Rd and two 1.5 FE of Bare Entirely Steep Hills [classed as DGo] They both fell in the central sectors and I managed to place them opposite each others and ran the road over the top of them both. Peter then chose 1 FE and two 0.5 FE of H [G] one of which fell in the central sector on his side and would not fit so had to be discarded. The table as viewed from my side is below.

Peter placed his baggage centrally behind his sides two H [G] and I anticipated that he was going to deploy his entire army to the right of the huge H [S]. He started to deploy his army from left to right from my view point so I mirrored his deployment and deployed each of my commands opposite his after he had deployed. He then totally surprised me by deploying his CinC's command to his left of the H[S] which isolated it from the rest of his army. Because I had four commands I could wait and see how he deployed and react accordingly.
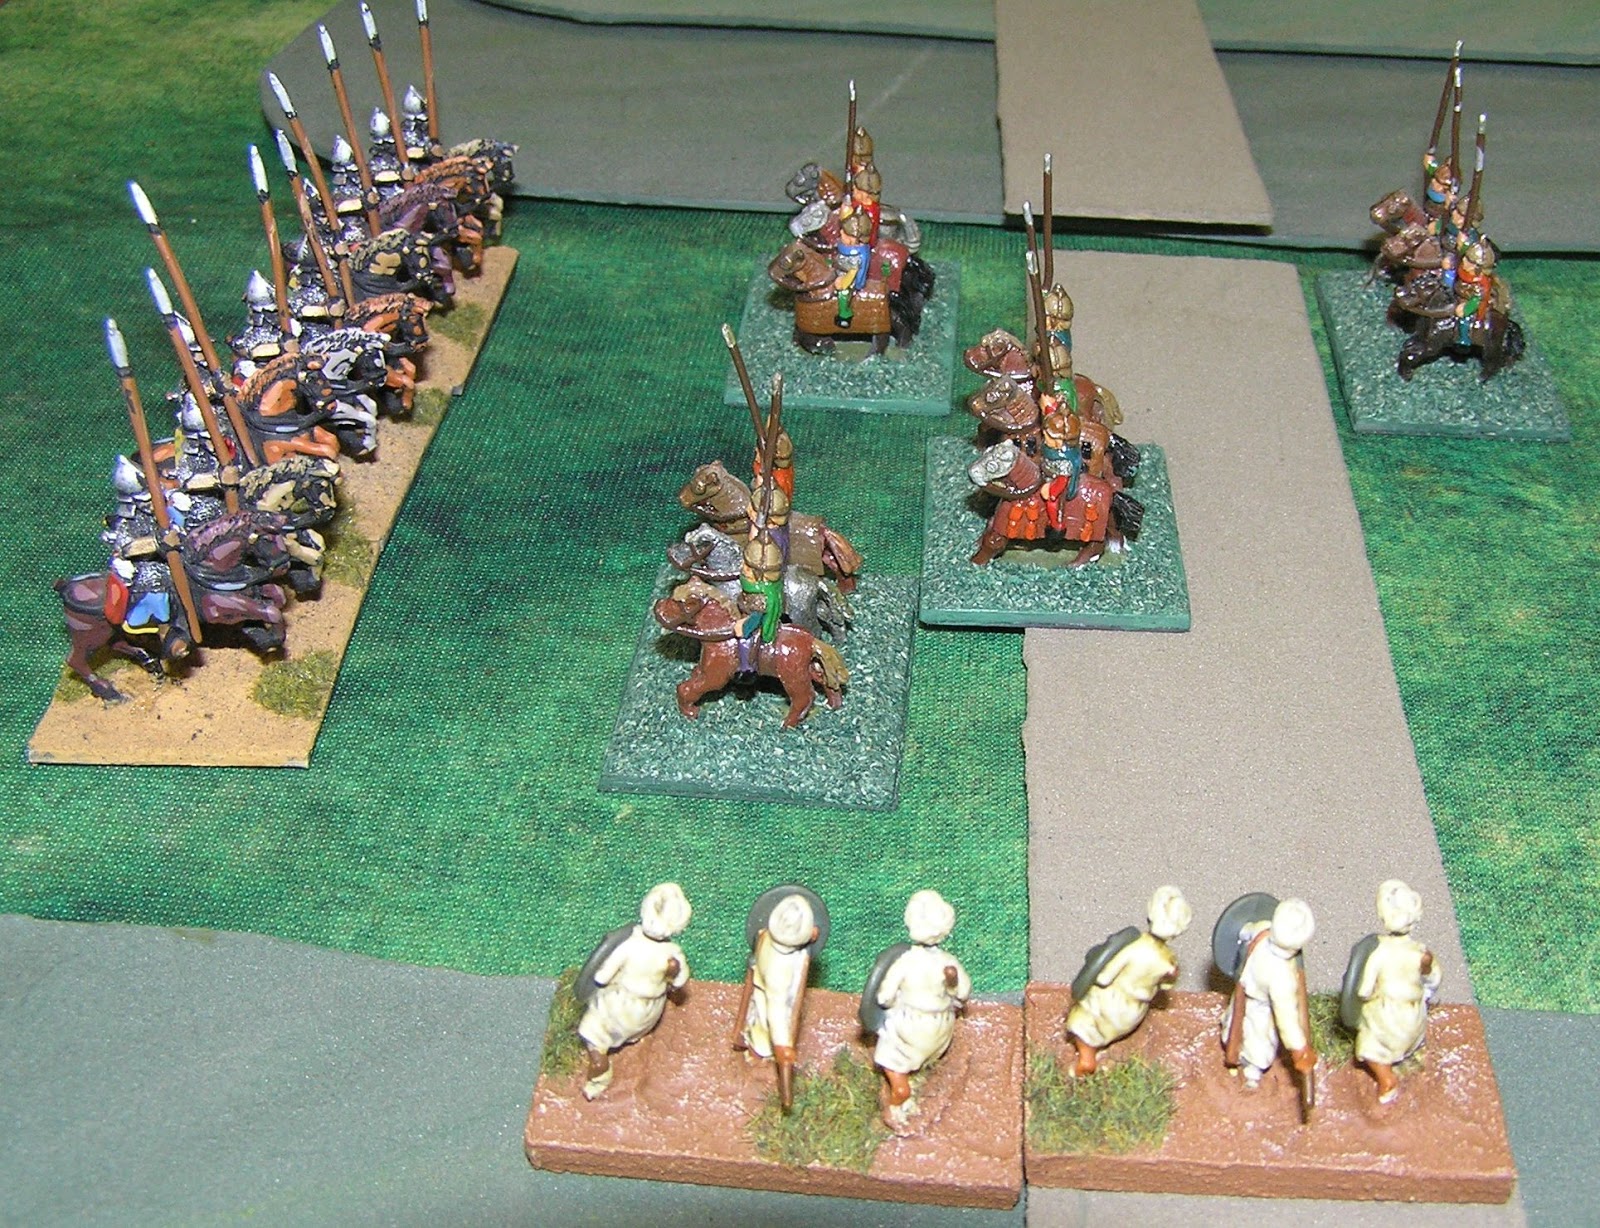
Below is the deployment reading from L to R - Peters C2 - C3 - C1 and mine as C2 - C1 - C4 with C3 behind C1. Upon reflection I would have been better served swapping C1 and C2's deployment positions but we can always be wise after the event. Having left my Buyid ally to last I saw how split up his initial deployment was so placed them in column on the road with the aim of forcing them forwards as quickly as possible onto the other H[S] and thereby split his army in two.


As you can see from above the deployment made for some interesting options. I rolled my first PIP dice and the Buyids were onside with a 5 which allowed me to rush forward four turns into the opposite H [S] barely held by a few Ps from the CinC's command.
The other three PIP dice were nothing special but at this time I wasn't too concerned. I slowly pushed forward with my three Samanid commands to deny him room to manoeuvre. See below.


Due to the much reduced visibility on entirely steep hills I had to slow my deployment options down and elected to concentrate on the column of Ps from his CinC's command that was advancing to threaten the flank of my Buyids.


Back on my side of the table I was pushing forward my elephant and used the large group of fast light horse to rill the space between my Khurosanian cavalry, the Dialami and the elephant.

I finally managed to find enough spare PIPs to deploy the Khorasanian's out into a solid line facing off his knights with the Dailami slightly refused to protect their exposed flank.

After a fraught couple of bounds I managed to get enough PIP's with the Buyids to form a battle line opposite both groups of Ps.

I managed to move over a pair of LH F to extend my Khorasanian battle line past the end of his knights on the far left.

With the elephant in position I wsa ready to begin my attack and slowly advanced my Bows and Spear wall towards the inferior infantry facing me in the centre.


My four Reg Bw O archers slowly fought it out with the six Irr Bw I facing me suffering a few recoils.

On the far left Peter threw in his knights against my Irr Cv S and slowly pushed me back.

On my right I threw in the Buyid general against the stationary Psiloi column from an uphill position and the combination of my Combat Factor - CF 3 [S] + General +1 and Uphill +1 = 5 v the Ps CF of 2 [O] and -1 for outflanked = 1 meant it was highly likely to only end one way. Peter duly rolled a 2 and this meant that I automatically won the combat and destroyed the front two Ps.

Below is the pushing and shoving that was happening on my left flank between the cavalry and knights. You will notice that my General is in combat because Peter 5 - 1'd the cavalry in front of the general making a hole in my line that not even being S could stop.


Peter was not inclined to get stuck in at this time and I luckily destroyed one of his Irr Bw I to shooting whilst my elephant faced up opposite the knights.

It was at this time Peter rolled a 1 for his CinC's PIP's dice which meant he was forced to advance his now rapidly isolated line of knights to his far left forward whilst he continued to move his column of knights under his CinC along his base line.

I managed to throw in the next group of Buyids against his other small group of Ps, again uphill and swept all three elements away.

It was at this time Peter rolled a 1 on his PIP dice for his central command which meant that apart from his leading knight which ceased to be impetuous because it would otherwise have hit my elephant that the rest of the column lost control and charged forward towards my elephant without contacting it. This allowed me to move the elephant forward in my next bound hit the lead knight in front of the rest of the disorganised column and slide over a Reg Bw O and Irr LH F as overlaps giving me a CF 5 v CF 2 Quick Kill [QK]. Peter again rolled poorly and I rolled high to take away a pair of knights.

Lots more pushing and shoving between the Irr Kn F and Irr cv S continued on my left flank.


Now there was an elephant in front of his knights giving Peter a major headache.Scratch two knights Qk by the elephant!


Peter then decided that his isolated column of knights to his far left should column up and advance through the open valley to my right between the two steep hills.


Peter cleverly slid a Kn over across the front of the elephant and hit the front of my two deep Reg Bw O that had been assisting the elephant and despite a CF 4 v CF 2 managed to roll higher than them destroying both. His central commands general was left facing my elephant which was a bad idea as later proved.

More pushing and shoving on my far left!


Having seen him dispatch my archers with his knight I then slid my elephant over to front contact his knight and again moved in the next adjacent archers and LH F as double overlaps to quickly dispatch this knight.

Having lost yet another Irr Cv S I was forced to throw in my Irr LH O to fill this gap on my far left.

It was at this time Peter's PIP luck deserted him again and his central command ended up with a 1 meaning that this commands Irr Kn F was forced to advance forward uncontrollably towards the LH F opposite his front which then placed him within movement reach of my elephant. This remaining knight was then quickly dispatched in my next turn by moving the LH F backwards sliding the elephant over into frontal contact with the enemy knight and overlapping it with the adjacent bow and LH F elements to make sure of the odds.


Here is the situation on my left flank just before this commands general was destroyed as a result of a CF of 3 [S] v CF 4 [F] and a 1 - 5 combat dice roll. This command had lost 4 elements so all I needed to do was roll better than four on three dice. Unsurprisingly I then rolled 1, 3, 3 which meant the command broke. Which started to draw this commands elements all over the place away from my central command.

Peter rolled another 1 PIP for his central command which meant his Kn F general charged forward out of control towards my elephant but not contacting it. It would have been rude not to have then attacked the general which I then did by placing the elephant into frontal contact supported by an archer to its flank giving me a CF 5 QK v CF 4. The roll went my way and the general died which was the sixth element lost from this command meaning that Peter could not save it from becoming demoralised. Much the same as happened to my left flank command.

Here you can see me moving the CinC's Ghulums to my right flank to try and block the valley before the knights broke through.

My broken left flank command streaming to the rear.

Moving back to my right flank Peter rolled a 1 PIP on his CinC's command which meant that the by now isolated column of knights were unable to be controlled and broke up into a mess heading towards my Ghulums.

With Peters central command being broken it started to cause me control issues and I was forced to move my Buyids forward out of the DGo hill behind his now fleeing spearmen. I also withdrew the elephant in an attempt to try and intercept the now rampaging knights to my left rear.

To the top of the picture below you can see his CinC's group of knights just getting ready to deploy behind his broken central command and threaten my Buyids.

Flee !

I was patiently waiting for the knights to advance against my Ghulums. I hit the lead knight front and centre CF 3 [S] v CF 2 [F] and dispatched the leading two elements out of the seven.

Visions of the Battle of Balaclava?


Fleeing troops drawing the enemy to my baseline.

I dispatched the middle one of this trio leaving the last four elements of knights to charge forward uncontrolled. I moved into front contact with the nearest enemy knight and threw in one of the Mountain Tribesmen Irr Ax O to prevent a recoil leaving the last three knights opposite my Ghulums.
The CinC finally managed to deploy his knights to threaten my Buyids and I was waiting certain defeat.

This was the situation in the valley at the end of the last bound where I had hit the last two knights frontally with a third stuck behind which was swept away when the element in front died. This broke the CinC's command and with it the Italo-Ostrogoth army.


For those who like stats we rolled for initiative at 10 am and I rolled the first invaders PIP's at 10.45. We played, chatted, had lunch, drunk tea, worked through move options and offered each other friendly advice on solutions on how a move might be possible with limited PIP's in some moves. The game finally ended at around 3 pm. Peter is one of those players who likes to take his time and ponder his moves and has said that theres no way he will play in a tournament setting. Personally I think his game whilst good would improve if he spent less time thinking about all the options and played a bit faster as sometimes you can over think the options.
The entire game lasted 5 hours from start to finish. Had we been playing in a tournament setting we would have played faster and at the three and a half hours time point the game was scoring 16 -16.
For Peter this was a practise game and I am happy to give him help and advice in a friendly game setting. His army organisation seems OK but he is still having major issues retaining command and control over the Irr Kn F. I think this will come with further practise with this army but as Peter said he has no interest in playing in external BHGS type time limited tournaments
Looks great, Nice battle Report perhaps as his confidence grows he may change his mind.
ReplyDeleteGood battle report and photos, Drew.
ReplyDelete