
Essex Medieval Cogs - Ready for Sale
 |
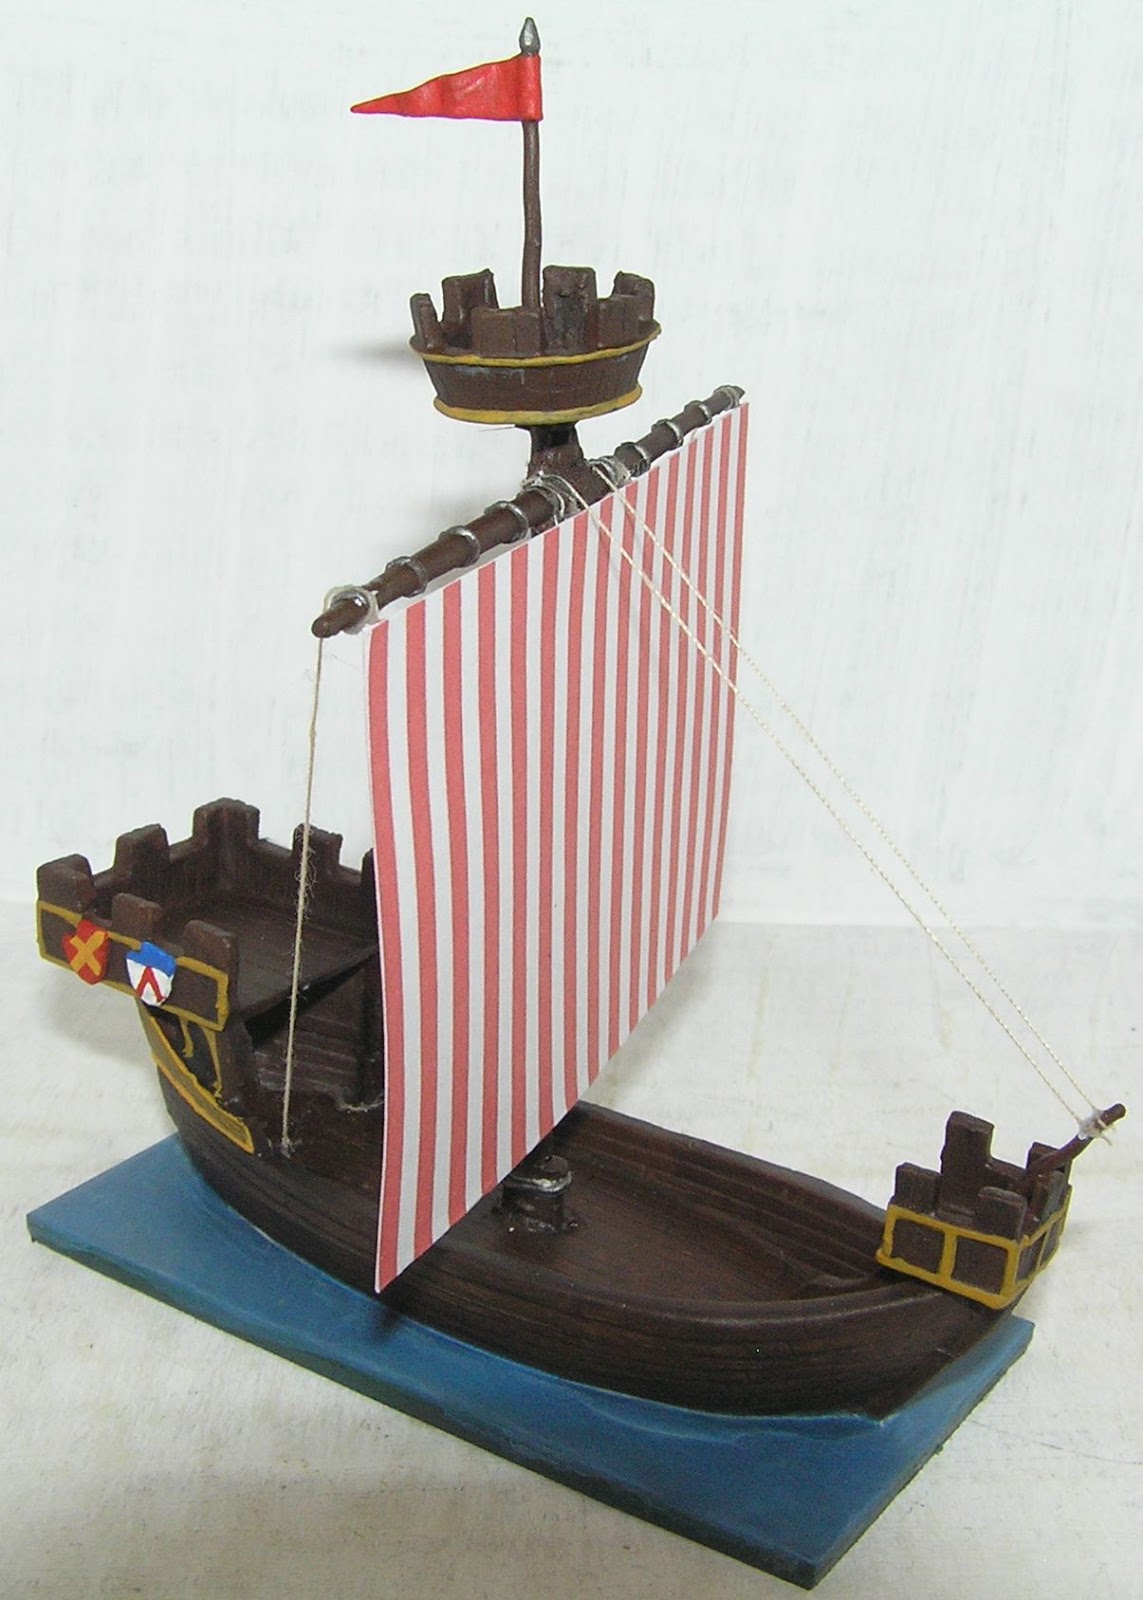
| Essex Miniatures Code Boat 4 Medieval Boat with Single Sail |

Having purchased six damaged Essex Medieval Cogs on EBay earlier this month I thought that they might be interesting to repair and complete properly. They don't have a scale listed on the Essex Website and I think that given the dimensions and size of the Crows Nest they are probably 1/300th scale as there's no way that a 15mm scale figure would realistically fit in the models. [link below]
https://www.essexminiatures.co.uk/products/boat4?fbclid=IwAR1KG4nhphSqX0T566_sWEkQk1cW5pGZQo3XNfIlKAAv9CleEUvbHOa-yy8
They are very expensive models to buy but with a lot of patience and effort you will end up with some very nice looking ships suitable for any wargames table.
Here are the models as listed on EBay. As you can see they were all broken, badly based and appeared to be undercoated a greenish brown colour.

After removing them from their old bases and giving them a good clean up with a stiff brush to remove what looked like lots of dust I set about trying to match the masts to the various hulls.
It turned out that only three of the masts were snapped off which I repaired by drilling down the centre of the mast with a 0.7mm drill bit and inserted a pin 10mm into the mast.


Once each ship was cleaned up and I had removed the old glue I restuck the masts using Boat Builders Superglue and then glued the pin repairs into the corresponding half for each mast and hull.

Next up was put them on Magnabased 80mm x 40mm Plasticard with more Superglue and paint them with a Dark Brown colour and a Black Wash.

It was whilst doing this I realised that each ship had been given two shields hung on each side of the Stern Castle. I then started to paint the shields in basic heraldic colours ready for them to be decorated properly.

I also lined the fine detail on the castles and painted each stern in a Brass colour and completed each of the 24 shields in a unique coat of arms. The bases took longer than I thought and were painted Deep Turquoise base coat with a Dark Blue wash followed by a Light Blue wash and completed with a very thin White wash to create the water effect. The completed hulls were then given a couple of coats of Matt Spray Sealer to protect them.

The sails were created by downloading Candy Stripe images from the net and folding them in half and glueing them together to create double sided sails.

I chose Candy Strip because this appears to be quite a common sailcloth pattern for this era according to some illustrations I found on line.


Each sail was hung on the spars by using four strands of cotton superglued to the backs of the sails and wrapped round the spars in a single loop leaving the spare thread hanging loose to use as the rigging.

This loose cotton was then wrapped round the mast at the centre to create the bowsprit rigging and glued to the inside hull from the endspars to create the stern rigging.

Once the glue was set I just had to trim off the excess cotton and I had six complete ships. Whilst I am tempted to keep them I am fairly sure that they will end up on EBay in the next few weeks.


Clever, they've turned out very nicely. I would have done three additional things.. 'bellied' the sails a bit so they look like they're in the wind. I use thinned PVA, then you can bend them into shape, and they dry pretty stiff. Run a brush up the side of the sails as the white edge is a shame given all the careful work you've put in. Finally, I would have dry-brushed the hull to bring out the planking. But that's personal taste. They do look very nice indeed.
ReplyDeleteI painted out the white edges as you suggested.
DeleteSold the last two today, Only took me a year to sell them but I am happy I made a profit which helps me fund my own hobby purchases.
ReplyDelete